I have never realized I’m a caffeineoholic until my coffeemaker broke down. It was a dark October morning with rain, mist, and half-bare branches behind the window – swaying in the harsh wind. Everything seemed to be part of a sinister plot devised to keep me at home and make me fall asleep.
The only remedy I could think of was a mug of freshly brewed coffee. But how was I to get one?
Suddenly, I had a flashback from early childhood – I “saw” my granddad brewing his coffee in a saucepan. I tried this method at once, which saved me from the worst scenario (it’s the first one described below).
While I was sipping my coffee, the darkness started to evaporate from the air behind the window. The rain stopped. As soon as I was out, I was kissed by generous rays of the sun, while the gentle breeze was playing with yellow and red leaves – a colorful start of a happy day.
I got a new coffeemaker as soon as I could. Still, as I didn’t want to get in trouble anymore, I promised myself to find as many methods of brewing coffee without a coffeemaker as possible. I tried each of them during the following week and now decided to share them.
Start exploring!
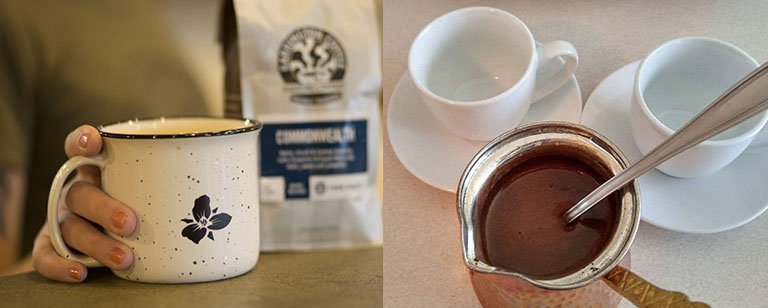
Saucepan coffee
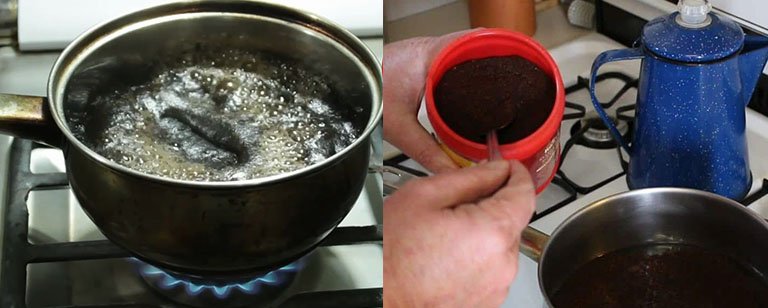
This method is very much like the cowboy coffee, except that you don’t need the campfire – a stove will be well enough.
Things you’ll need:
- ground coffee beans
- a measuring cup
- a small saucepan
- a spoon to stir the mixture with
- a ladle or a strainer
- a mug or a cup.
Instructions
- Fill the saucepan with water. I recommend taking a little more water than you usually use for your coffeemaker.
- Add the coffee grounds. There should be as much as you typically put in the coffeemaker. Now, mix the liquid with a spoon or ladle.
- Place the saucepan on a stovetop (medium-high heat).
- While the mixture is warming up, stir it every now and then so that the grounds on the bottom of the saucepan don’t burn.
- Let the coffee boil for two minutes without covering it.
- Now, it’s time to kill the heat and cover the saucepan. Leave it for four to five minutes.
- My grandfather used a strainer to keep the grounds from getting into his mug. If you’ve got a strainer at hand, you don’t even have to wait and may pour the coffee immediately after you turned off the heat. I didn’t have the right strainer at home, so I just used a small ladle to scoop the beverage. You may stick to either method or just pour the coffee very slowly trying not to let the grounds in your mug.
Enjoy your coffee!
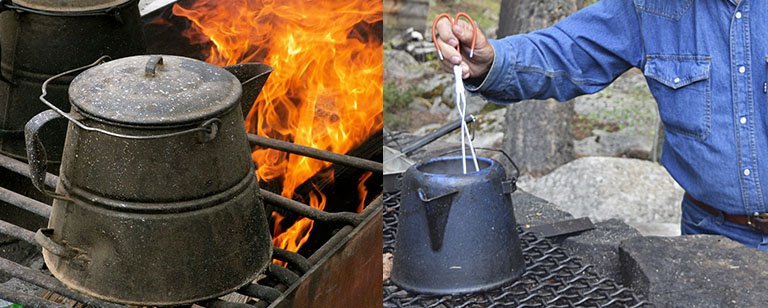
Cowboy coffee
I should warn you from the start – be ready for a disappointment if you’re used to the refine and clear taste of the coffee from your coffeemaker.
Things you’ll need:
- ground coffee beans (I recommend medium grind or fine)
- a measuring cup
- a pot, a saucepan, or a kettle
- a spoon to stir the mixture with
- a mug or a cup.
Instructions
- Pour the water into the pan. You need to take a little more water than you typically do as some of it will evaporate and some will be left in the pan and house the sludge. 10-15% more water will be enough. Typically, you’ll need eight ounces of water per serving.
- Add the coffee. As a rule of thumb, measure out two tablespoons of grounds for every eight ounces of water. However, you may discover this recipe doesn’t satisfy you or, vice versa, results in a coffee that’s too strong. You’re free to experiment.
- Mix the grounds and the water in the pan.
- Place the pot over an open flame. Alternatively, you may opt for a stove. I can’t say a campfire can bring about any other advantages, apart from the atmosphere.
- Bring the mixture to a boil. Don’t cover it.
- 45 seconds after your cowboy coffee starts boiling, stir it.
- Remove the pot from the heat after two minutes of boiling. Again, don’t cover it.
- Leave it alone for three to five more minutes. This step is crucial. While leaving the coffee to sit for so long may add some bitter flavors, it’s necessary for the grounds to go down to the bottom of the pan. Due to this, they won’t get into the mug. To understand whether the time is right, check whether all the grounds have settled to the bottom of the pan.
- Now, the coffee is ready to be poured into your cup. Try not to let the grinds into your cup. A ladle or strainer will be of some help, although these are not the things cowboys typically take with them when they’re on an adventure.
Enjoy your coffee!
Note: In another version of the cowboy coffee recipe, the grinds are added only when the water boils. You may try both ways and see which one works best for you.
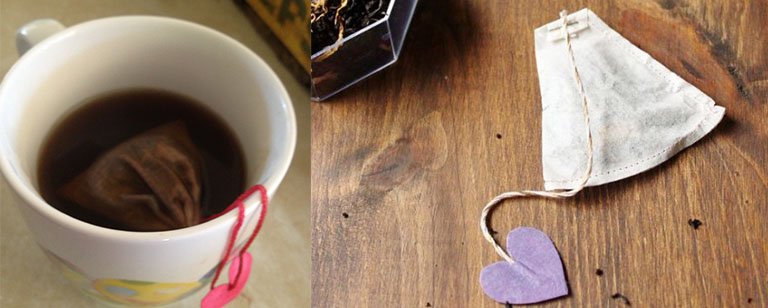
Coffee bag

This is probably the easiest way ever. While coffee connoisseurs won’t appreciate it, a coffee bag at least gives you a quick caffeine fix.
Also, there’s one more “but.” This method may work only in one case – if you happen to have a ready-made coffee bag at hand (ground coffee in small semi-transparent bags, similar to tea bags – you may buy these in any supermarket). If not, I’ll show you how to make one by yourself – just skip to the following method.
But first, here’s what you do if you do have coffee bags at home.
Things you’ll need:
- a coffee bag
- a mug
- water.
Instructions
- Place the coffee bag in your mug.
- Heat the water. After it boils, wait 30 seconds and pour the water into the mug. So as not to let the bag immediately get on the surface, pout the water very slowly and make sure the bag saturates it.
- Leave the mug for about four minutes. If you prefer strong coffee, you may extend the period up to five or six minutes, while a two- or three-minute wait will give you a weaker coffee.
- Before you pull the coffee bag out of the mug, you may make the coffee stronger by squeezing the bag with a spoon.
Enjoy your coffee!
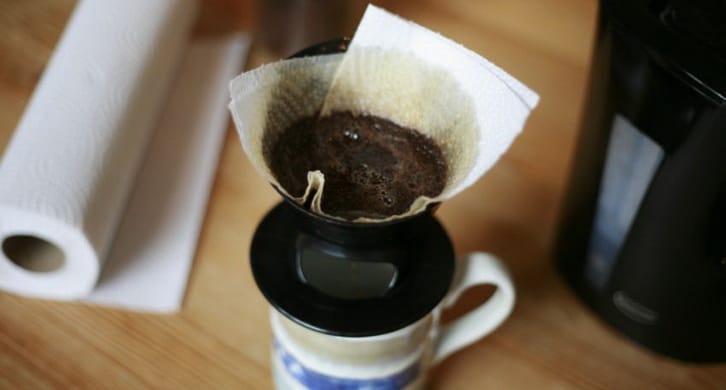
DIY coffee bag
Things you’re going to read may deeply offend the coffee snob inside your heart. To prevent it, just imagine you’re taking part in a historical reconstruction pretending to be an 18th-century Frenchman. This is exactly how they brewed their coffee back then.
Things you’ll need:
- coffee grounds
- a coffee filter (if you don’t happen to have one at hand, you may take a tea bag and remove the tea from the inside)
- string
- water
- a mug.
Instructions
- Measure the amount of coffee you typically take for a single mug.
- Place the coffee into the filter (or the empty teabag).
- Close the filter tightly making a little pouch, then tie the top with the string. Leave a long piece of string so that you can pull the pouch out of the mug when the coffee is ready.
- Bring the water to a boil.
- Put the DIY coffee bag into the mug and pour the water directly over it.
- Leave the coffee to sit from two to six minutes depending on whether you need a stronger or weaker flavor.
- Pull out the coffee bag.
Enjoy your coffee!
Strainer coffee
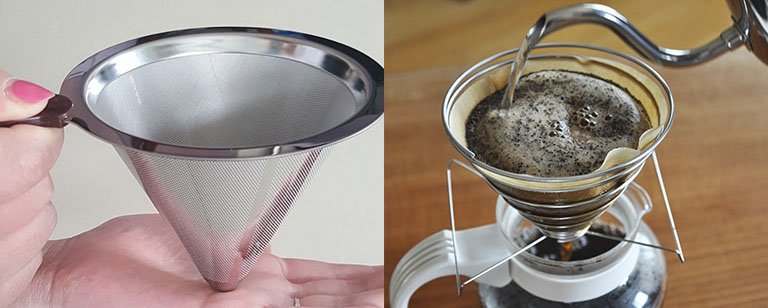
Do you have a decent strainer at hand? I mean the one with tiny holes capable of keeping up small coffee grounds. A double-layer mesh strainer may do the job just well.
Things you’ll need:
- coffee grounds
- water
- a kettle (alternatively, you may use a saucepan)
- a strainer
- a mug.
Instructions
- Measure the water and pour it into the kettle.
- Measure the coffee grounds depending on the amount of water.
- Place the grounds in the kettle and mix them with the water.
- Heat the water until it starts boiling. From this point, the water needs to keep boiling for two minutes.
- Remove the kettle from the heat.
- Now, use your strainer while pouring the coffee in the mug. Due to the strainer, you don’t have to wait till the coffee grounds settle down at the bottom of the kettle.
Enjoy your coffee!
Cotton cloth coffee
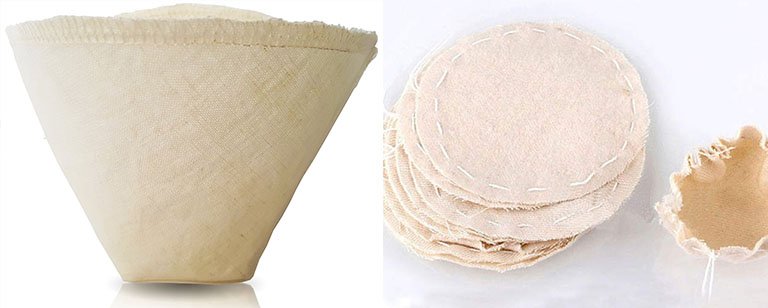
Like the coffee bag method, this is another way to make coffee without actually boiling it. This means you sacrifice much of the flavor. On the positive side, it’s probably the most creative method as you’re free to experiment with materials. Cotton cloth can be replaced by a clean handkerchief or linen cloth. If you have a coffee filter, it’ll work just as good, although, in this case, you may find the DIY coffee bag method more convenient.
To hold the cloth around the mug, you’ll need clothespins. These can be replaced by binders, elastics, paper clips – anything capable of doing the job.
Things you’ll need:
- coffee grounds
- water
- binders, elastics, paper clips or clothespins
- clean cloth (linen, cotton), a clean handkerchief or just a coffee filter
- a mug.
Instructions
- Put the cotton cloth over the top of your mug.
- Slightly press the cloth creating enough space for a serving of coffee grounds.
- Secure the improvised filter in place with clothespins, elastics etc. As a rule of thumb, we recommend using three or more clothespins so as not to let the cloth move.
- Put the coffee grounds on the cloth.
- Boil the water. Pour a little over the cloth. Wait not less than 30 seconds to let the grounds get wet.
- Now, pour the rest of the water over the grounds.
- You may remove the cloth and the binders right now or wait a couple of minutes to get a stronger flavor.
Enjoy your coffee!
Mock French Press
You can use this method not only in the kitchen but also on a picnic or during a hike – it works perfectly well with a campfire.
Things you’ll need:
- coffee grounds
- water
- a tablespoon
- a mug for drinking
- a deep bowl (you may use another mug or something with a spout).
Instructions
- Put the coffee grounds in the deep bowl (or the mug in which you’re going to brew it). You need somewhere between one and two tablespoons of grounds per eight ounces of water.
- Boil the water, wait around 20 seconds, and then pour some water in the mug. Make sure the grounds have soaked the water completely (this will happen in around 30 minutes).
- Add the rest of the water and leave it for four minutes.
- Press the grounds to the bottom of the mug with a spoon.
- Now, you’re ready to pour the coffee in your mug. Do it slowly, trying not to let the grounds slip in the mug from which you’re going to drink. You may use the spoon or a strainer for the purpose.
Enjoy your coffee!
Microwave Coffee
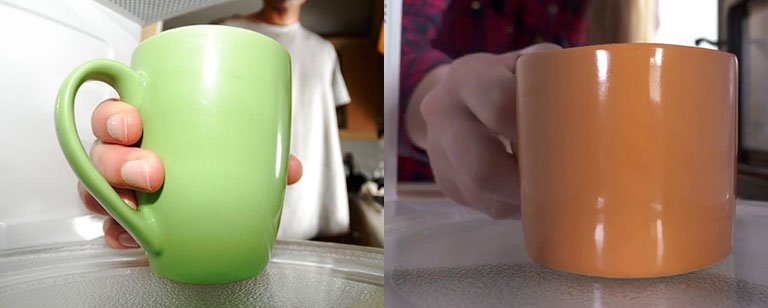
The only difference between this method and those described above is that you boil the water in the microwave.
Things you’ll need:
- coffee grounds
- water
- microwave
- a mug.
Instructions
- Pour the cold water in the mug and warm it up in the microwave. It’ll take you about two minutes. The liquid should be extremely hot without actually boiling.
- Put one or two tablespoons of coffee grounds and mix.
- Leave the mug for four minutes. You may drink the coffee right from the same mug or pour it in another mug to get rid of at least some of the grounds.
Enjoy your coffee!
Now you’re familiar with seven ways of getting a caffeine fix. Although I still believe a coffeemaker is the shortest way to a perfect cup of coffee, these life hacks will save your good mood even if the world is against you!